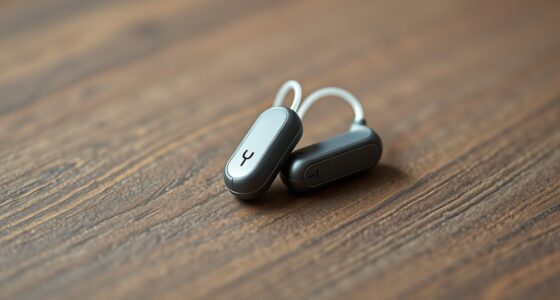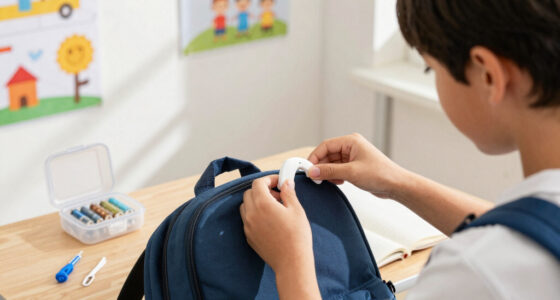


Set up your wireless hearing aids by checking compatibility, charging or fitting the devices, pairing them with a phone or accessory, and testing the features you plan to use. This guide is for first-time users and caregivers who can access the hearing aids’ model details and any fitting instructions from an audiologist or hearing care professional. Allow 30–60 minutes for setup, then take a few days to become familiar with the controls. Follow the manufacturer’s instructions for your specific model; menus and wireless features vary.

Get everyday helpers delivered free with Prime
- Fast, free delivery on millions of items
- Prime Video, Amazon Music and more included
- Member-only deals all year

Oldriv K159 Rechargeable In-Ear Hearing Aids with Noise Reduction
- ✔ Fit: Completely-in-canal, in-ear
- ✔ Noise features: Noise reduction and feedback cancellation
- ✔ Controls: Button control

EarCentric EasyCharge Rechargeable Behind-the-Ear Hearing Aids, Pair
- ✔ Fit: Behind-the-ear
- ✔ Package: Pair
- ✔ Controls: Button control; adjustable volume
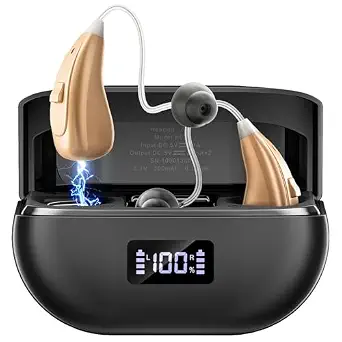
OTC Hearing Aids for Seniors with Noise Cancellation and 100+ Hour Battery Life
- ✔ Fit: In-ear
- ✔ Audio processing: 16-channel
- ✔ Noise feature: Adaptive noise cancellation
Difficulty: Beginner | Time: 30–60 minutes for setup; a few days to get used to the controls
What You’ll Need
Tools & Materials:
- Wireless hearing aids and their charger or batteries
- A compatible smartphone or wireless accessory, if you plan to stream audio
- The hearing aid manufacturer’s app, if available
- The hearing aids’ model name and pairing instructions
Knowledge:
- Basic smartphone skills, such as opening Settings and installing an app
- How to turn the hearing aids on and off using their controls or charger
Ask your hearing care professional or check the manufacturer’s compatibility list before pairing. Some hearing aids connect directly to certain phones; others need a separate streaming accessory. Keep your phone charged, install available operating system updates, and have the hearing aids nearby. Do not change prescribed amplification or fitting settings to solve a connection problem; contact your hearing care professional for fitting changes.
Oldriv K159 Rechargeable In-Ear Hearing Aids with Noise Reduction
The Oldriv K159 is the lineup’s most discreetly styled option: a completely-in-canal device with button controls, noise reduction, and feedback cancellation. That fit may appeal to us if a behind-the-ear aid feels too visible or gets in the way of glasses. The compact design is the main reason to choose it; EarCentric is easier to identify as a pair and offers much longer stated use between charging opportunities, while Oldriv’s description focuses on the individual in-ear device and a 24-hour maximum.Its kit includes a charging box, cleaning tool, domes, wax caps, and a USB-C cable, which gives us practical supplies for routine care. A full charge takes about three hours, so we need to plan ahead instead of assuming a quick top-up. There is a more basic uncertainty too: the package details say “only one item” is listed, without clearly establishing whether the purchase includes a left-right pair. We should confirm quantity and whether the fit and output suit our hearing needs before buying. Compared with the other two models, K159 prioritizes low-profile placement over explicit pair packaging, multi-level controls, or a long case-backed runtime.
Pros:
- Completely-in-canal fit for a low-profile look
- Noise reduction and feedback cancellation are listed
- Up to 24 hours of stated use per charge
- Charging box, USB-C cable, domes, and cleaning supplies are included
Cons:
- A full charge takes about three hours
- Package details list only one item, leaving pair quantity unclear
- No hearing-loss range or detailed clinical performance information is provided
Best for: Buyers who prioritize a completely-in-canal appearance and want rechargeable operation with basic button controls.
Not ideal for: People who need clear confirmation that the box contains a matched pair, want a stated fast charge, or prefer easy-to-handle behind-the-ear controls.
Bottom line: We’d choose the Oldriv K159 for its compact in-canal style, after confirming the package quantity and suitability of its fit.
“We’d choose the Oldriv K159 for its compact in-canal style, after confirming the package quantity and suitability of its fit.”
EarCentric EasyCharge Rechargeable Behind-the-Ear Hearing Aids, Pair
EarCentric EasyCharge is the most straightforward choice for buyers who want a clearly specified pair and a familiar behind-the-ear shape. Its pocket-size case carries three additional charges, which can reduce how often we need to find an outlet on a trip or through busy days. The description says a quick charge can provide up to three days of use, a notably longer stated interval than the Oldriv’s 24 hours per charge. Because it does not give a precise charging duration, though, we cannot compare how quickly that convenience is restored.Adjustable volume and environmental noise reduction make this model more explicitly configurable than Oldriv’s simple button-controlled description. It is also described as sweatproof and compatible with tablets, televisions, and smartphones, though those details do not tell us whether it streams audio wirelessly. The listed 12-month warranty and on-demand support add a support path that is not specified for Oldriv. Against the 16-channel in-ear model, EarCentric trades detailed processing and saved preferences for a behind-the-ear pair with substantial case capacity. Its main drawback for careful comparison is missing information: software update support is unknown, and we are not given a precise charge time or a defined hearing-loss range.
Pros:
- Sold as a pair with adjustable volume
- Case carries three additional charges
- Up to three days of use is stated after a quick charge
- 12-month warranty and on-demand support are listed
Cons:
- Exact charging time is not specified
- Software update support is listed as unknown
- No hearing-loss range or detailed clinical performance information is provided
Best for: Buyers who want a rechargeable behind-the-ear pair, adjustable volume, and extra case charges for travel or long days.
Not ideal for: People who want a discreet in-ear device, detailed audio-processing specifications, or a precise charging-time estimate.
Bottom line: We’d favor EarCentric when pair packaging and extended case charging matter more than a discreet in-ear fit or detailed processing controls.
“We’d favor EarCentric when pair packaging and extended case charging matter more than a discreet in-ear fit or detailed processing controls.”
OTC Hearing Aids for Seniors with Noise Cancellation and 100+ Hour Battery Life
This 16-channel OTC model stands out for the strongest combination of stated processing detail and battery endurance. It lists adaptive noise cancellation, five volume levels, and the ability to store preferred settings, so we can make an adjustment and have it persist instead of repeating the setup each time. The charging claim is also specific: 25+ hours per charge and 100+ hours with the case, with charging completed within two hours. That gives it the clearest runtime advantage over Oldriv’s 24-hour claim, while EarCentric remains compelling for people who specifically prefer behind-the-ear fit and an explicitly sold pair.Each device weighs three grams and uses one-button control, which may make the daily routine simple, although five levels offer more choice than the control method alone suggests. The listing includes a one-year warranty and identifies the product as FDA-registered. Those points do not establish how well it will address an individual hearing loss, and the description supplies no hearing-loss range or detailed clinical performance results. We also do not know the charging case’s weight, and the supplied details do not make package quantity as clear as EarCentric’s “Pair” title. This pick is strongest when runtime, settings retention, and stated processing are priorities; buyers wanting a discreet canal fit may prefer Oldriv, while those seeking the longest listed interval between charges can start here.
Pros:
- 25+ hours per charge and 100+ hours with the case are stated
- 16-channel processing with adaptive noise cancellation is listed
- Five volume levels and saved preferred settings
- Three-gram device weight and one-year warranty
Cons:
- No specific hearing-loss range or clinical performance details are provided
- Charging case weight is unspecified
- Package quantity is less explicit than EarCentric’s pair listing
Best for: Buyers who value long stated runtime, stored preferences, and several volume settings in a lightweight in-ear device.
Not ideal for: People who need a clearly stated hearing-loss range, a specified case weight, or an explicitly confirmed pair in the package.
Bottom line: We’d pick this model for its stated runtime and saved settings, while checking fit and package quantity before ordering.
“We’d pick this model for its stated runtime and saved settings, while checking fit and package quantity before ordering.”
As an Amazon Associate we earn from qualifying purchases.
Before You Start
Protect your hearing and devices: Start with the volume low, especially before streaming audio. Use only cleaning and charging methods approved for your model. Keep hearing aids and chargers away from water unless the manufacturer says they are water resistant. If you have sudden hearing loss, ear pain, or a device that causes discomfort, contact a hearing care professional or clinician rather than trying to fix it through app settings.
Bluetooth menus differ between phone brands and hearing aid models. If your model uses a specific accessibility menu or app for pairing, follow that model’s instructions. Pairing from the wrong phone menu can leave the devices visible but not connected for calls or streaming.
Step-by-Step Instructions
Step 1: Check compatibility and connection type
Find the hearing aid model name on its case, paperwork, or app, then check the manufacturer’s phone compatibility list. Confirm whether the aids connect directly to your phone or require an accessory for streaming. If you use two aids, check whether the model pairs as a set or requires pairing each side separately.
Tip:Bluetooth support alone does not guarantee that every phone can stream to every hearing aid. Follow the hearing aid maker’s compatibility details.
Check: You know which phone features are supported and whether you need an accessory.
Step 2: Charge or prepare the hearing aids
Charge rechargeable aids in their supplied charger, or install the specified batteries if your model uses them. Follow the model’s indicator lights or app status to confirm adequate power. Take the aids out of the charger or switch them on as directed before pairing.
Tip:Some rechargeable aids enter pairing mode when removed from the charger; others require a button press or a phone menu command. Use the instructions for your model.
Check: The aids power on, and their battery indicators show they are ready to use.
Step 3: Install the manufacturer’s app
Open your phone’s official app store and install the app named by the hearing aid manufacturer. Check the publisher name before installing. Open the app, review its Bluetooth permissions, and allow the permissions needed to find and connect to your aids.
Tip:Keep the app open during initial setup. If the app asks for location access, read its explanation; some phone systems use that permission to scan for nearby Bluetooth devices.
Check: The app opens and displays setup instructions for your hearing aid model.
Step 4: Pair the hearing aids with the phone
Place the aids close to the phone. Put them into pairing mode using the manufacturer’s instructions, then follow the app’s connection steps or the phone’s hearing device pairing menu. If prompted, select both hearing aids or the named hearing aid set, and accept the pairing request. Wait for the app or phone to report that the connection is complete.
Tip:If the phone lists multiple similar device names, use the model or left/right labels shown in the instructions. Do not pair with an unknown nearby device.
Check: The app shows the aids as connected, or the phone lists them in the hearing device settings as paired and connected.
Step 5: Set up a streaming accessory if needed
If your aids require a TV streamer, microphone, or phone clip, charge or power that accessory and place it near the phone and hearing aids. Follow its pairing instructions, then connect it to the hearing aids through the manufacturer’s app or controls. Select the accessory as the audio source when you want to use it.
Tip:Keep the accessory’s manual nearby. Some accessories pair to the phone, while others connect to the hearing aids directly.
Check: The accessory appears in the app or its indicator confirms a connection, and you can select it as an input or audio source.
Step 6: Test hearing aid controls and audio
Use the app to check battery level and try a basic control, such as volume or program selection. Then start a short, familiar audio clip at low volume. Raise the volume gradually only if needed. Test a phone call separately if you plan to take calls through the aids.
Tip:App volume changes may affect the hearing aids’ overall settings. If a control makes sounds uncomfortable or unusually loud, restore the previous setting and consult your hearing care professional.
Check: You hear the test audio through the intended hearing aid or accessory, and the app responds to the control you tried.
Step 7: Practice daily connection and care
Turn the aids off or place them in their charger, then reconnect them using the routine recommended by the manufacturer. Practice adjusting volume, changing programs, muting a call, and switching streaming sources if those options are available. Clean and store the aids as directed, and charge them on the schedule for your model.
Tip:Write down the steps for reconnecting and the support contact for your hearing care professional. A simple routine can make connection issues easier to identify.
Check: You can reconnect the aids and use the features you need without relying on the initial setup prompts.
Common Mistakes to Avoid
- Pairing from a general Bluetooth menu when the model requires its app or hearing device settings. — Follow the manufacturer’s pairing path. If pairing fails, remove the saved connection and begin again using the model-specific instructions.
- Starting streamed audio at a high volume. — Set the phone and hearing aid volume low before playing audio, then increase it gradually to a comfortable level.
- Assuming all wireless functions work with every phone. — Check the compatibility list and confirm whether calls, media streaming, and app controls are supported on your specific phone.
- Changing fitting settings to fix a wireless problem. — Troubleshoot the connection first. Ask your hearing care professional to make changes that affect prescribed sound settings.
Troubleshooting
Problem: The phone cannot find the hearing aids.
Solution: Charge or power on the aids, move them close to the phone, and activate pairing mode as described by the manufacturer. Turn Bluetooth off and back on, then retry from the recommended app or hearing device menu. Check that the aids are not connected to another nearby phone.
Problem: The aids show as paired, but audio plays through the phone speaker.
Solution: Open the phone’s audio output selector during playback or a call and choose the hearing aids. Check the app’s streaming settings and confirm the model supports that type of audio on your phone. Disconnect and reconnect the aids if the output option is missing.
Problem: Only one hearing aid connects.
Solution: Place both aids in pairing mode and follow the instructions for pairing them as a set. If the phone has saved separate or old entries, remove those entries and pair again. Contact the manufacturer or hearing care professional if one aid remains unavailable.
Problem: The connection drops or sounds cut out.
Solution: Keep the phone close to the aids, move away from sources of wireless interference, and check the battery levels. Restart Bluetooth or the phone, then reconnect. If dropouts continue in several locations, contact the hearing aid maker or your hearing care professional.
What Success Looks Like
The hearing aids power on reliably, appear connected in the correct app or phone settings, and respond to the controls you tested. Any planned streaming accessory connects, and a test clip or call routes to the intended aids at a comfortable volume. You can repeat the connection routine after turning the aids off or charging them.
Next Steps
Use the aids in short, comfortable sessions if they are new to you, and follow your hearing care professional’s wear schedule. Keep the charger, phone, and app updated according to their manufacturers’ instructions. Record any recurring connection failures or uncomfortable sound changes, including when they occur, and share those details with your hearing care professional or device support team. Arrange a follow-up fitting if the sound, comfort, or controls do not meet your needs.
Frequently Asked Questions
Do wireless hearing aids connect to every smartphone?
No. Compatibility depends on the hearing aid model, phone model, and operating system. Check the hearing aid manufacturer’s current compatibility information before pairing.
Can I use wireless hearing aids without a smartphone?
Usually you can use the hearing aids for their core hearing function without a phone, though the method for changing programs or settings varies. Some wireless features, such as app control or phone streaming, need a compatible phone or accessory.
Why can I hear music but not phone calls in my hearing aids?
Media and call routing may use different phone settings or require separate support from the hearing aids. Check the call audio setting, the active output during a call, and the manufacturer’s instructions for your model.
Should I leave Bluetooth on all the time?
Follow your phone and hearing aid makers’ guidance. Leaving Bluetooth on usually allows supported devices to reconnect, while turning it off can interrupt streaming and app control.
What should I do if the aids connect but sound uncomfortable?
Lower the volume or stop streaming, then return to a comfortable setting. Contact your hearing care professional about ongoing discomfort or changes to how speech and other sounds seem; wireless pairing does not adjust the hearing aid fitting.
Halloween Picks
halloween
As an affiliate, we earn on qualifying purchases.