
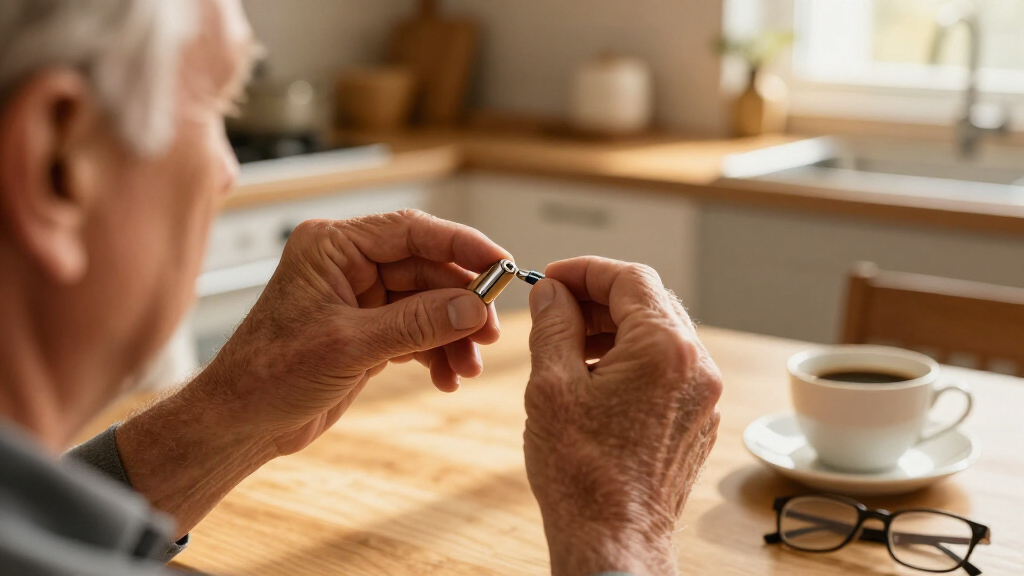

This guide shows you how to replace the battery in a hearing aid, from identifying the correct battery size to inserting it, activating it, and confirming your device works properly. It also covers how to maximize battery life and what to do when a new battery does not seem to work. The task takes only a few minutes once you know the steps, but doing it correctly matters: a battery inserted upside down, handled with wet fingers, or activated too early can leave you without sound or shorten battery life by days. This guide is written for first-time hearing aid users, family members or caregivers helping someone with hearing aids, and anyone switching from rechargeable to disposable batteries for the first time. No technical background is required — only steady hands, good lighting, and the right battery size.

Get everyday helpers delivered free — and shop member deals
- Fast, free delivery on millions of items
- Access to Prime Big Deal Days deals on October 6–7
- Prime Video, Amazon Music and more included
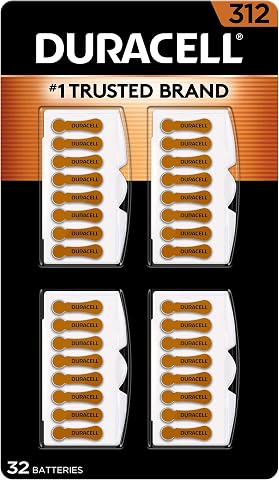
Duracell Hearing Aid Batteries Size 312 (Brown), 32 Count
- ✔ Brand: Duracell
- ✔ Battery Size: 312 (Brown)
- ✔ Number of Batteries: 32

Powermax Size 312 Hearing Aid Batteries, 60 Count, Brown Long Tab
- ✔ Brand: Powermax
- ✔ Battery Size: 312
- ✔ Quantity: 60 Count

Duracell Size 13 Orange Hearing Aid Batteries, 16 Count
- ✔ Brand: Duracell
- ✔ Battery Size: 13
- ✔ Color Code: Orange
Difficulty: Beginner | Time: 10-15 minutes
What You’ll Need
Tools & Materials:
- A fresh hearing aid battery in the correct size (see Step 1 for how to identify it)
- Your hearing aid(s)
- A flat, clean, well-lit work surface (a table with a towel or mat prevents batteries from rolling away)
- Reading glasses or a magnifier if you have difficulty seeing small parts
- Optional: a battery tester designed for zinc-air button cells
Knowledge:
- Which hearing aid style you wear (behind-the-ear, in-the-ear, receiver-in-canal, or completely-in-canal)
- How to open the battery compartment of your hearing aid (a fingernail or the tip of a cleaning tool usually works)
- Basic hand hygiene — wash and dry your hands before handling batteries
Most hearing aids with disposable batteries use zinc-air button cells, which are activated by air. This is why they come with a peel-off sticker: the battery is dormant until the sticker is removed and air enters the cell. Buying the correct size before you start is half the task. If you do not know your size, remove the old battery and read the number printed on it, or check the hearing aid’s user manual. If the compartment is empty, your audiologist or hearing aid provider can tell you the size from the model name.
Duracell Hearing Aid Batteries Size 312 (Brown), 32 Count
The Duracell Size 312 EasyTab pack earns our top spot because it solves the problem that plagues most hearing aid batteries: handling. The extra-long EasyTab doubles as both the activation tab and an installation tool, letting you peel, place, and insert without pinching a slippery button cell between your fingertips. It carries the Arthritis Foundation’s Ease of Use certification, a distinction neither other product in this lineup can claim — and it matters enormously for the demographic most likely to be changing hearing aid batteries daily or weekly.Compared with the Powermax 60-count, you get fewer batteries per purchase, but you gain a 4-year storage guarantee and a brand with a long track record of consistent voltage output across the cell’s life, rather than fading noticeably in the final days. The color-coded brown tabs make it simple to confirm you’re buying the right size, which is a genuine benefit for anyone ordering on behalf of a parent or relative. The tradeoff is the same one facing every zinc-air option here: no recharging, so this is a recurring expense rather than a one-time buy. Still, for most 312 users, the combination of reliability and handling makes this the safest default choice.
Pros:
- Extra-long EasyTab simplifies handling and installation
- Ease of Use Certified by the Arthritis Foundation
- Guaranteed 4-year shelf life in storage
- Color-coded brown tabs prevent size mix-ups
Cons:
- Zinc-air chemistry cannot be recharged, creating ongoing replacement costs
- Smaller count than bulk alternatives means a higher per-battery cost
Best for: Size 312 users who prioritize easy handling, especially anyone with arthritis or limited dexterity
Not ideal for: Heavy daily users who want the lowest per-battery cost, or anyone whose device uses a size other than 312
Bottom line: The most user-friendly and dependable 312 option available, and the one we’d recommend to most hearing aid wearers.
“The most user-friendly and dependable 312 option available, and the one we’d recommend to most hearing aid wearers.”
Powermax Size 312 Hearing Aid Batteries, 60 Count, Brown Long Tab
Where the Duracell EasyTab pack wins on refinement, the Powermax 60-count box wins on sheer volume. For wearers who replace batteries every three to five days, a 60-cell supply can last several months, and the per-battery economics clearly favor buying in bulk rather than smaller packs. The premium zinc construction delivers a steady 1.4 volts, and the long brown tabs keep handling manageable even if they lack the EasyTab’s certification-backed ergonomics.Compared directly with our top pick, Powermax offers broad compatibility across hearing aid brands and an eco-friendlier composition with no cadmium or mercury. The honest tradeoff is packaging: compliance with Reese’s Law means the batteries ship in child-resistant packaging that some users find genuinely difficult to open — arguably a bigger annoyance for this product than for the Duracell packs. There’s also no stated storage guarantee, so if you’re a light user stockpiling batteries, the Duracell’s four-year freshness promise offers more peace of mind. But for the frequent wearer who values quantity and consistent output, this is the smarter buy.
Pros:
- Large 60-count pack offers the best value for frequent users
- Mercury- and cadmium-free eco-friendly composition
- Long brown tabs make handling easier
- Broad compatibility with most hearing aid brands
Cons:
- Child-safe packaging required by Reese’s Law can be hard to open
- No stated long-term storage guarantee, so stockpiling carries some risk
Best for: Daily or near-daily hearing aid users who go through batteries quickly and want to minimize per-battery cost
Not ideal for: Occasional users, or those with limited hand strength who may struggle with the child-safe packaging
Bottom line: The quantity-first choice that makes the most sense for high-frequency wearers tired of reordering small packs.
“The quantity-first choice that makes the most sense for high-frequency wearers tired of reordering small packs.”
Duracell Size 13 Orange Hearing Aid Batteries, 16 Count
Hearing aid batteries are not one-size-fits-all, and the Duracell Size 13 pack exists for the many devices that take the larger, orange-coded cell instead of the brown 312. Size 13 batteries typically power behind-the-ear aids with higher drain, and this pack delivers the same trusted Duracell chemistry and consistent output, just in the form factor your device requires. Like our top pick, it carries a 4-year shelf life, so even a 16-count box won’t degrade sitting in a drawer.The smaller pack size is actually a deliberate strength here rather than a drawback: Size 13 wearers often replace batteries less frequently than 312 users because the larger cell holds more capacity, so 16 cells stretch further than you might expect. Compared with the two 312 options above, the obvious limitation is universality — this pack is useless if your device takes any other size, so double-check your aid’s battery door or manual before ordering. The tradeoffs are modest: the plastic packaging can be stubborn to open, and the tabs are standard length rather than the EasyTab design. But if orange is your color, this is the dependable, no-surprises option.
Pros:
- Trusted Duracell power output and reliability
- 4-year shelf life keeps spares fresh
- Convenient 16-count size suits the longer life of Size 13 cells
- Color-coded orange packaging reduces ordering mistakes
Cons:
- Only compatible with Size 13 devices — not universal
- Plastic packaging can be difficult to open
- Standard-length tabs lack the EasyTab’s handling advantage
Best for: Hearing aid wearers whose devices require Size 13 (orange) batteries, especially behind-the-ear models
Not ideal for: Anyone with a 312, 10, or 675 device, or users who struggle with stiff plastic packaging
Bottom line: The right pick for orange-tab devices, offering Duracell reliability in a pack size that matches Size 13’s longer replacement cycle.
“The right pick for orange-tab devices, offering Duracell reliability in a pack size that matches Size 13’s longer replacement cycle.”
As an Amazon Associate we earn from qualifying purchases.
Before You Start
Wash and thoroughly dry your hands before touching the battery or the hearing aid. Moisture and skin oils are the two most common causes of premature battery failure and poor contact. Work over a towel or soft surface so the small battery does not bounce and roll away if dropped. If you have any fluid drainage from an ear infection, do not insert the hearing aid until it has cleared, and wipe the device down before replacing the battery. Keep hearing aid batteries away from children, pets, and anyone who might mistake them for candy or a pill — button batteries are a serious swallowing hazard. Also confirm your hearing aid actually uses disposable batteries: many newer models have sealed rechargeable cells and no battery door at all. If your device has no compartment that opens, it is rechargeable, and you should charge it with the supplied charger instead.
Step-by-Step Instructions
Step 1: Identify the correct battery size
Pick up your hearing aid and locate the battery compartment, usually on the side or bottom of the device. Open the compartment and remove the old battery if one is present. Read the number and color code printed on the battery or on the sticker: 675 (blue) for most powerful behind-the-ear models, 13 (orange) for standard behind-the-ear and some in-the-ear models, 312 (brown) for receiver-in-canal and smaller in-the-ear models, and 10 (yellow) for the smallest completely-in-canal models. Write this number down or take a photo of it so you can match it when buying replacements.
Tip: The color of the sticker or packaging matches the size across all major brands, so even if you switch battery brands, the color stays the same.
Check: You have a fresh battery whose number (675, 13, 312, or 10) and color match the old battery or your manual’s specification.
Step 2: Remove the sticker and let the battery breathe
Peel the tab or sticker off the back of the new battery without scratching or puncturing the surface underneath. Place the battery on the table with the exposed side facing up, and wait one full minute before inserting it. Zinc-air batteries need air to reach full voltage, and inserting them immediately is a leading cause of weak sound and short battery life.
Tip: Set a timer or count to sixty. This one-minute wait is the single most skipped step and the most common reason a ‘dead’ new battery seems faulty.
Check: The sticker is fully removed, no residue remains on the battery surface, and at least 60 seconds have passed.
Step 3: Open the battery compartment fully
Hold the hearing aid firmly in one hand and swing the battery door open with the fingernail of your other hand until it stops. Open it fully — most doors double as on/off switches, and fully open means the hearing aid is off. Inspect the compartment for dust, moisture, or corrosion. Wipe away any debris gently with a dry cotton swab or the small brush that came with your hearing aid. Stop and see the Troubleshooting section below if you see white or green crusty deposits.
Tip: Never force the door open past its stop point. The hinge is small and snaps easily, and a broken door usually means a repair visit.
Check: The compartment is fully open, clean, and dry, and the battery sits level inside the door or tray without tilting.
Step 4: Insert the battery with the correct side facing up
Pick up the battery with dry fingers, holding it by the edges. Place it into the compartment so that the flat side with the sticker (the plus side, marked with a +) faces up toward you. Let the battery settle flat into the recess — most doors have a small magnetic lip or a shaped recess that pulls it into place, so avoid pressing hard. Remove the battery, recheck the orientation, and try again if it does not sit flush. Avoid metal tweezers, which can short the battery.
Tip: If you find orientation confusing, remember: the side that had the sticker goes up, and the smooth raised side faces down into the compartment.
Check: The battery lies flat in the compartment and does not rock or tilt when you lightly touch its edge.
Step 5: Close the compartment and turn the hearing aid on
Swing the battery door closed until it snaps shut with light pressure — closing the door completes the circuit and powers the device on. Listen for a startup jingle or beep, which many hearing aids play when switched on. Wait a moment for the device to initialize before pressing any program button or volume control.
Tip: If the door will not close easily, do not force it. Open it again and confirm the battery is seated correctly — a raised battery is nearly always the cause.
Check: The door is fully closed and flush with the hearing aid body, with no gap, and you hear a startup beep or jingle (on models that have one).
Step 6: Test that the hearing aid is working
Cup the hearing aid in your hand or hold it in your fist without covering the microphone openings. Listen for a faint whistling or squealing sound after a few seconds — this feedback confirms the amplifier is producing sound. Insert the hearing aid in your ear and listen to normal speech or a television at a comfortable volume, checking that speech sounds as clear as it normally does with a fresh battery.
Tip: No whistling when cupped usually means no power. Before assuming the battery is dead, reopen the door, flip the battery, and confirm the correct side faces up.
Check: The device whistles faintly when cupped in your hand, and speech sounds normal and consistent in both ears once inserted.
Step 7: Store and dispose of the old battery safely
Place the old battery in a small container or sealed bag reserved for dead batteries — do not leave it loose in a pocket, purse, or drawer. Keep it out of reach of children and pets. Collect dead batteries and take them to a pharmacy, hearing aid provider, or household hazardous waste collection point that accepts button cells. Recycle them instead of throwing them in regular household trash if recycling is available in your area.
Tip: Keep new batteries in their sealed packaging at room temperature. Do not refrigerate them — condensation can damage the cells — and do not carry loose batteries near metal keys or coins, which can short-circuit them.
Check: The old battery is contained and out of reach of children and pets, and your spare batteries are stored sealed, dry, and away from metal objects.
Common Mistakes to Avoid
- Inserting the battery immediately after removing the sticker — Always wait a full minute after peeling the tab. Zinc-air batteries build voltage gradually once exposed to air, and inserting them early can cause weak sound, intermittent cutouts, and shortened life.
- Placing the battery in upside down — The side the sticker was on (marked +) always faces up. If the door will not close or the device does not power on, flip the battery before trying anything else.
- Handling the battery with wet or greasy fingers — Wash and dry your hands before every battery change. Hold the battery by its edges; moisture and oils on the flat face block the air holes and degrade the cell.
- Buying the wrong size because the packaging looks similar — Match the number (675, 13, 312, or 10) and the color code, not the brand. Take a photo of the old battery’s number and compare it at the store or when ordering online.
Troubleshooting
Problem: The hearing aid produces no sound after a fresh battery is inserted
Solution: Open the battery door and confirm the battery is the correct size and oriented with the + side up. Remove the battery, wait another minute, and reinsert it. If it still does not work, try a second new battery from a different package — occasionally an entire pack is old or drained. If a second battery fails too, the problem is likely the hearing aid itself, not the power source.
Problem: Sound cuts in and out during the day
Solution: Check that the battery sits flat and the door closes flush; a loose battery breaks contact with movement. Wipe the battery and compartment contacts with a dry cotton swab. Moisture in the ear or the device can also cause cutouts — use a hearing aid dehumidifier or drying kit overnight.
Problem: White or green crusty deposits in the battery compartment
Solution: This is corrosion from a leaking battery. Do not insert a new battery yet. Gently clean the compartment with a dry cotton swab; if the deposits are stubborn, a swab very lightly dampened with white vinegar can dissolve them, followed by thorough drying. If corrosion is heavy or the contacts look damaged, take the hearing aid to your provider before using it again.
Problem: Batteries die much faster than expected
Solution: Check the expiration date on the package — zinc-air batteries degrade even when sealed. Confirm you are not removing stickers long before use, since the battery starts draining the moment air enters. High streaming use, high volume, and humid environments all shorten life. Typical life is 3 to 10 days depending on size (size 10 is shortest, 675 longest); if you are consistently below that with fresh, dated batteries, have the device checked.
What Success Looks Like
The battery change is successful when: the battery door closes flush with no gap; the hearing aid produces a startup beep or whistles faintly when cupped in your hand; speech sounds normal and evenly balanced in both ears; and the device runs consistently for its expected battery life (roughly 3 to 10 days depending on battery size and your usage). If all of these are true, the battery is correctly installed and activated, and the device is drawing power properly.
Next Steps
Mark the date of each battery change on a calendar or in your phone so you learn your personal replacement cycle, and reorder batteries when you open your last full pack. Store spares sealed at room temperature, away from metal and moisture. If your hearing aid has a low-battery warning tone, note what it sounds like so you recognize it in the future. Consider asking your audiologist about rechargeable hearing aid models at your next check-up if frequent battery changes are inconvenient. Schedule a professional cleaning and check-up every six months, and contact your hearing aid provider if you see repeated corrosion, swollen batteries, or a cracked battery door — those need professional repair, not a battery swap.
Frequently Asked Questions
How long do hearing aid batteries typically last?
It depends on the battery size and how much you use the device. As a general guide: size 675 lasts 9 to 14 days, size 13 lasts 6 to 10 days, size 312 lasts 3 to 7 days, and size 10 lasts 3 to 5 days. Heavy streaming from a phone, high volume settings, and humid climates shorten this range.
Why is there a sticker on the battery, and can I remove all stickers in advance?
The sticker seals the air holes and keeps the zinc-air battery dormant. No, do not peel stickers ahead of time — the battery starts draining the moment air enters and will not last its normal lifespan, even if you store it afterward. Remove the sticker only when you are ready to insert the battery.
Can I use any brand of hearing aid battery?
Yes, as long as the size number and color code match your hearing aid. Sizes are standardized across brands, so a 312 from any manufacturer fits any hearing aid that uses 312 batteries. Quality and lifespan vary slightly between brands, so buy from a reputable source with fresh dates.
Are hearing aid batteries rechargeable?
Standard zinc-air button batteries are not rechargeable — never put them in a charger, as they can leak or rupture. However, many newer hearing aids use sealed rechargeable lithium-ion cells that charge in a docking station. Check whether your device has a battery door: if it does, it uses disposable batteries; if it does not, it is rechargeable.
What should I do with dead hearing aid batteries?
Store them in a sealed container out of reach of children and pets, then drop them off at a pharmacy, hearing care provider, or battery recycling point. Many communities treat button batteries as household hazardous waste. If recycling is genuinely unavailable locally, tape over the battery and dispose of it according to your local waste guidelines.
Fall Picks
fall essentials
As an affiliate, we earn on qualifying purchases.