TL;DR
Hearing aid drying kits help remove everyday moisture from sweat, humidity, rain, or condensation. Passive desiccant kits and electronic dryers work differently, and neither makes a hearing aid waterproof or repairs water damage. Check your device and dryer manuals for compatibility, especially with rechargeable models, and ask your hearing care professional if you are unsure.
A little sweat after a summer walk can leave your hearing aids feeling fine while moisture quietly settles around their microphones, receivers, or battery contacts. Hearing aid drying kits can help manage that everyday dampness, but they are care tools, not waterproofing or repair devices.

Get everyday helpers delivered free with Prime
- Fast, free delivery on millions of items
- Prime Video, Amazon Music and more included
- Member-only deals all year
This guide explains the two common kit types, what drying can and cannot do, and how to build a routine that fits your device. You’ll also see why a rechargeable hearing aid needs a compatibility check before it goes into a dryer, and what to do if a device gets soaked or starts behaving oddly.
Think of a drying kit like a raincoat for your routine: it helps with regular exposure, but it cannot undo every storm. The safest first step is simple: check the hearing aid and dryer instructions before you buy or use either one.
Drying kits help manage everyday moisture from sweat, humidity, rain, or condensation; they do not make hearing aids waterproof.
Passive kits use desiccants, while electronic dryers may use gentle heat or airflow; check maintenance and compatibility before choosing.
Read both manuals before using a dryer with rechargeable hearing aids, chargers, or accessories.
UV features do not sterilize a device or replace cleaning and professional infection control advice.
Skip rice and uncontrolled heat after a soak; follow the manufacturer’s instructions and contact your hearing care provider if problems persist.
How a drying kit helps protect your hearing aids from everyday dampness
Hearing aid drying kits help remove moisture that can build up from sweat, humidity, rain, or condensation. Moisture matters because hearing aids rely on small electrical contacts and acoustic openings that need to stay clear and dry. Dampness can contribute to corrosion at contacts, interfere with microphone or receiver performance, or make sound unreliable. A drying routine may reduce that everyday exposure, but it cannot make a device waterproof or reverse damage that has already occurred.
Picture a warm day when you walk home quickly, then step into an air-conditioned shop. A thin film of condensation can form as temperatures shift, much like a cold glass beading on a kitchen table. Even when the moisture is not visible, repeated exposure can add up. Drying after wear gives moisture time and a suitable environment to dissipate before the next use; it is preventive care, not a guarantee against failure.
The practical payoff depends on your life and hearing aid. Someone who wears devices all day in a humid climate or sweats heavily during a commute may face more frequent exposure than someone who wears them briefly in a dry home. That can make a regular routine useful, while for another person the added step may offer little benefit. The device maker’s guidance and a hearing care professional’s advice help you weigh that benefit against the time and kit upkeep involved.
Drying also has limits. If a device gets soaked, stops working, or begins cutting in and out, a kit may not reverse corrosion or physical damage; waiting through repeated drying cycles could delay a needed repair. Follow the device instructions, remove disposable batteries if applicable, and contact your provider if the problem persists.
Products Worth Considering
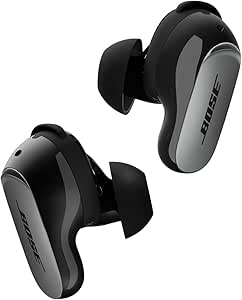
Bose QuietComfort Ultra Earbuds (2nd Gen), Wireless Noise-Cancelling Earbuds with Immersive Audio and Wireless Charging Case, Black

Bose TV Speaker Compact Soundbar with Bluetooth and HDMI-ARC, Black
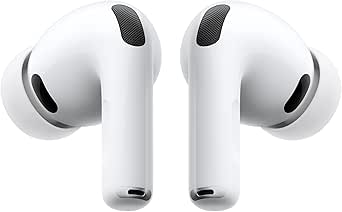
Apple AirPods Pro 3 Wireless Earbuds with Active Noise Cancellation
As an affiliate, we earn on qualifying purchases.
Choose between a simple desiccant jar and an electronic dryer
Hearing aid drying kits usually come in two forms: a passive container with a moisture-absorbing desiccant, or an electronic unit that uses gentle heat, circulating air, or both. Either type may help manage moisture, but they ask for different tradeoffs. A passive kit is simple and has no powered cycle, while an electronic unit may offer more control or convenience but adds equipment, cleaning, and compatibility questions.
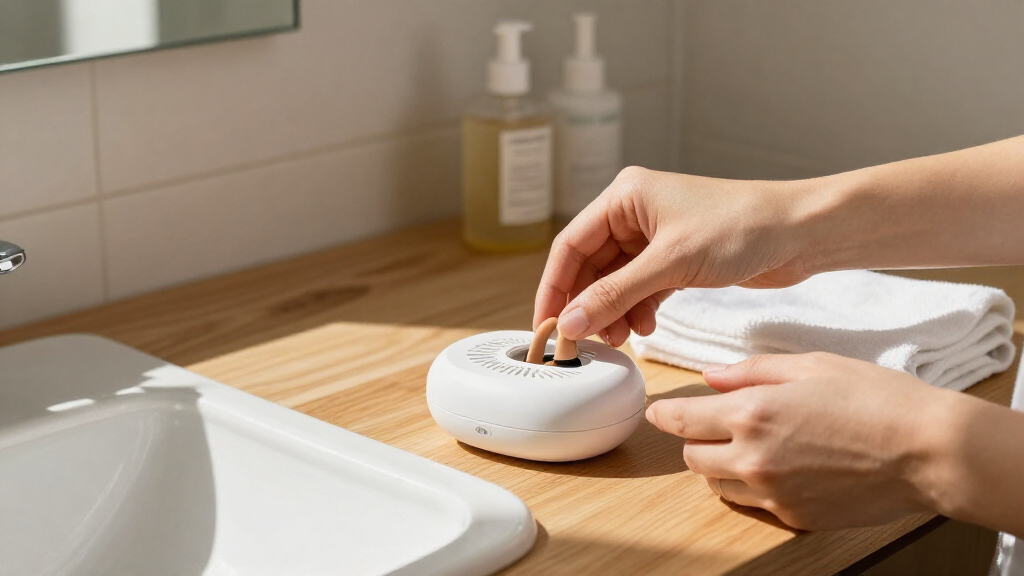
A desiccant jar is the simple option: place the device in a sealed container with silica gel or another drying material, following the kit’s directions. The desiccant absorbs moisture from the enclosed air, so its usefulness depends on the material still having capacity. If it is saturated or overdue for reactivation, the routine can look unchanged while doing less. This option can be low-maintenance in use, but you need to track replacement or reactivation according to the product’s schedule and conditions.
An electronic dryer can offer timed cycles or controlled airflow, and some models are built to charge rechargeable hearing aids while drying them. Others include UV light. These features can make a bedtime routine easier, especially when the device is designed for the user’s exact model, but more features do not automatically mean better drying or broader compatibility. Heat, charging contacts, and accessory placement all depend on the product design, so a label that says “dryer” does not mean every device, charger, or accessory can safely go inside.
| Feature | Passive desiccant kit | Electronic dryer |
|---|---|---|
| How it works | Absorbs moisture in a sealed container | May use gentle heat, airflow, or both |
| Upkeep | Replace or reactivate desiccant as directed | Follow device instructions and keep the unit clean |
| Best next step | Check the kit’s replacement schedule | Confirm hearing aid and charger compatibility |
For example, if you have rechargeable aids, compare both manuals before choosing a dryer. A compatible model made to dry and charge might simplify your bedtime routine; another may require removing the aids from their charger first. The deciding factor is not which type sounds more advanced, but whether its method is approved for your device and practical enough that you will use and maintain it consistently.
Use your drying kit safely with this simple bedtime routine
To use a hearing aid drying kit safely, follow the instructions for both your hearing aid and the kit, remove visible debris as directed, and place the device inside only if the maker says it is compatible. Small differences in coatings, rechargeable parts, and charger design can change what is suitable. Treating the manuals as a pair matters: one may allow a drying method while the other limits where the aid or charger can be placed.
- Check the manuals. Look for the approved drying method, temperature guidance, and any limits for rechargeable models or accessories. This prevents a routine intended to protect the device from exposing it to unsuitable heat or charging conditions.
- Clean visible wax and debris. Use only the tools and method recommended by the manufacturer or your hearing care professional. Debris can block openings, and drying does not remove it; cleaning first helps you avoid mistaking a blockage for a moisture problem.
- Set up the kit as directed. Put the hearing aid in the specified position, close the container or start the approved cycle, and follow the stated timing. Placement and timing are part of how the kit is designed to work, so improvising can reduce its benefit or create compatibility issues.
- Maintain the kit. Replace or reactivate desiccant on the schedule supplied with the product, or clean the electronic unit as its manual explains. A neglected desiccant may lose capacity, and a dirty dryer can undermine the care routine it is meant to support.
Imagine your normal evening: you remove your aids, wipe away a little visible debris with the recommended tool, then place them in an approved dryer before brushing your teeth. Connecting the steps to something you already do makes the routine easier to repeat, while a clear spot beside your charger helps prevent misplaced devices or accessories.
Do not put liquids or cleaning sprays into openings, and do not poke microphones or receivers with sharp objects. If the instructions conflict or say nothing about your particular model, ask your hearing care professional before using heat or charging features. A brief compatibility check is more useful than guessing, because an incorrect method can add risk without improving moisture control.
Know what UV lights and “disinfecting” claims really mean
UV features in some hearing aid dryers may reduce certain surface microbes under specified conditions, but they do not sterilize the device. A UV cycle is not a substitute for cleaning visible earwax or following infection control advice from a qualified professional. The distinction matters because a device can still have debris or surfaces the UV light does not adequately reach, even after a cycle completes.
That distinction matters because “UV” can sound like a complete clean. Think of it like sunlight through a window: the light is part of the environment, but it does not scrub away wax or reach every hidden surface in the same way. A dryer’s results depend on its design and how you use it, so read the manufacturer’s specific claims rather than assuming all UV functions do the same thing.
For instance, if you see wax around an earmold after a long day, the first task is to remove it using the approved method. Running a UV cycle while leaving debris in place does not replace that care. If you have concerns about irritation, an infection, or cleaning advice for a particular device, contact a hearing care professional.
UV light does not make a hearing aid sterile. Treat it as a feature with limited, product-specific claims—not as a replacement for cleaning or professional advice.
Drying and cleaning solve different problems: one manages moisture, while the other removes visible debris. Keeping those jobs separate helps you avoid expecting one gadget to do everything.
Respond calmly when your hearing aid gets soaked or stops working
A drying kit can help manage everyday dampness, but it cannot promise to fix a soaked, corroded, or physically damaged hearing aid. If your device gets wet or begins acting erratically, follow its instructions, switch it off if permitted, remove disposable batteries if applicable, and contact your hearing care provider when the problem persists. These steps matter because a soaked device may need service, while continuing to operate or charge it against the manual’s advice could worsen the problem.
Say a rain shower catches you on the way home and your hearing aid begins to crackle. Avoid the tempting quick fix of a hair dryer, radiator, oven, or bag of rice. Uncontrolled heat can damage components, while rice or other household materials can leave dust or particles behind. A household workaround may add a new problem without addressing the original fault.
Instead, check the manual for the manufacturer’s wet-device instructions. Rechargeable models may have different steps from devices with disposable batteries, so do not assume advice for one applies to the other. If the aid no longer works after the recommended steps, arrange a check with your audiologist or hearing care provider; professional assessment can help distinguish moisture damage from a blocked opening, battery issue, or another fault.
Also remember that moisture is only one possible cause of a fault. A clogged opening, a depleted battery, or another device issue can produce similar symptoms. A drying cycle is not a diagnosis; if the sound remains weak, cuts out, or stays distorted, get professional help rather than relying on repeated cycles to identify the cause.
Decide whether daily drying fits your climate and device
Daily drying may suit people who sweat heavily, live in humid conditions, or wear their hearing aids for long hours, but not every device needs the same routine. Your manufacturer’s advice and your hearing care professional’s guidance should shape the schedule. The goal is to manage the moisture your devices actually encounter, without adding an unnecessary step or using a method the maker does not recommend.
For example, a delivery worker wearing hearing aids outdoors through a humid summer may face a different moisture pattern from someone who uses them for a few hours in a cool, dry office. The first person might ask about regular drying because repeated exposure can make moisture management more relevant; the second may be told to follow the device’s standard care directions. Neither routine should be copied blindly from someone else, because climate, wear time, and device construction all affect the fit.
Before buying, check whether the kit fits your hearing aid and charger, how its desiccant is maintained or its electronic cycle works, and whether its instructions suit your routine. A simple jar may be enough for one person, while another may value timed cycles or a compatible combined dryer and charger. The tradeoff is convenience versus added cost and upkeep, so prioritize a method you can maintain and the manufacturer permits.
- Match the kit to the device: confirm model and charger compatibility.
- Match the routine to exposure: consider sweat, humidity, and how long you wear your aids.
- Check the upkeep: find out when desiccant needs replacement or reactivation.
- Ask before using heat: get advice if the manual is unclear.
That quick check can prevent an appealing feature from becoming a poor fit. The best kit is the one your device maker permits and you can use consistently; consistency matters because an elaborate routine that is hard to maintain may be less useful than a simple approved one you follow.
Frequently Asked Questions
Do hearing aids need to be dried every night?
Not all hearing aids need nightly drying. Follow the manufacturer’s advice, and ask your hearing care professional whether regular drying fits your climate, activity, and device.
Can I use a drying kit with rechargeable hearing aids?
It depends on the hearing aid and dryer. Some products are designed to dry and charge compatible models, while others may require you to remove the device from its charger; check both manuals.
Is a desiccant jar as effective as an electronic dryer?
Both can help manage moisture, but they work differently. Electronic dryers may offer controlled airflow or heat, while passive kits rely on desiccant that you replace or reactivate as directed.
Do UV hearing aid dryers disinfect the devices?
Some UV features may reduce certain microbes under specified conditions, but they do not sterilize hearing aids. Keep cleaning visible debris and follow professional infection control advice.
Can a drying kit fix a hearing aid that has stopped working?
It may help if temporary moisture is causing the problem, but it cannot repair corrosion, physical damage, or other faults. If the hearing aid keeps cutting out or remains silent, contact your hearing care provider.
Can I use rice or a hair dryer instead of a kit?
Rice is not a reliable substitute and can leave particles behind. Household heat from a hair dryer, oven, or radiator is uncontrolled and may damage components, so follow the manufacturer’s instructions instead.
Conclusion
Choose a hearing aid drying routine around your device’s instructions and the moisture it actually faces. A suitable kit can help manage everyday dampness, but it cannot waterproof your aids, replace cleaning, or repair every fault.
Check the manuals before you buy, then give your devices a safe place to rest overnight—like a small dry harbor after a long day out.